Scheduling Emails in Outlook: Easy and Comprehensive Tutorials
In the realm of modern communication, the ability to schedule emails has become an invaluable asset for both personal and professional correspondence. Scheduling emails allows users to plan their communications ahead of time, ensuring that messages are sent at the most opportune moments. This can significantly enhance time management, enabling individuals to focus on other tasks without worrying about missing critical email dispatches.
One of the foremost advantages of scheduling emails is strategic timing. By sending emails at times when recipients are more likely to engage, users can improve the chances of their messages being read and acted upon promptly. Additionally, this feature helps avoid the pitfalls of late-night emails, which can sometimes be perceived as unprofessional or intrusive. Instead, users can draft their messages whenever convenient and schedule them to be sent during business hours or at other suitable times.
Microsoft Outlook stands out as a powerful tool for email management, offering a range of features designed to streamline communication. Among these features is the ability to schedule emails, which is available across various versions of the platform, including Outlook 365, the Outlook app, and the Outlook desktop client. This functionality empowers users to automate their email delivery, ensuring that their messages reach the intended recipients at the right moment.
As we delve into the detailed tutorials on how to schedule an email in Outlook, it is essential to recognize the broader context of this capability. Whether you are using the Outlook desktop application, the Outlook web app, or the mobile app, the process is designed to be intuitive and accessible. With a few simple steps, you can take control of your email timing, enhancing your overall communication strategy and efficiency.
Understanding the Benefits of Email Scheduling
Email scheduling in Outlook offers a myriad of benefits that extend beyond mere convenience. One primary advantage is the ability to manage communications across different time zones. For instance, if your business partners are located in Europe while you are based in the United States, scheduling emails allows you to ensure that your messages are delivered during their working hours, enhancing the likelihood of timely responses and efficient collaboration.
Moreover, scheduling emails can significantly bolster the effectiveness of your communications by ensuring they are sent at optimal times. Research indicates that emails sent during specific times of the day, such as mid-morning or early afternoon, have higher open rates. By scheduling your emails in Outlook, you can capitalize on these peak times, thereby increasing engagement and response rates.
Maintaining a professional image is another key benefit of email scheduling. Sending emails during odd hours, such as late at night or early in the morning, can sometimes appear unprofessional or intrusive. By using the scheduling feature in Outlook 365 or the Outlook app, you can draft your emails at your convenience and set them to send during regular business hours, projecting a polished and organized image to your recipients.
Email scheduling is also particularly advantageous for specific scenarios like marketing campaigns or project management. For instance, in a marketing campaign, you can schedule a series of emails to be sent at strategic intervals, ensuring consistent communication without overwhelming your audience. Similarly, in project management, scheduling progress updates or meeting reminders in advance can help keep all team members on track and informed, without the risk of forgetting or last-minute rushing.
Incorporating email scheduling in your workflow, whether through Outlook desktop or the web app, can streamline your communication processes, optimize your outreach efforts, and uphold a professional demeanor, making it an indispensable tool in modern business practices.
Setting Up Your Outlook Account for Scheduling
Before diving into the details of how to schedule an email in Outlook, it is crucial to ensure that your Outlook account is properly set up and configured. This preparation ensures a seamless experience when utilizing the scheduling feature.
First, make sure you are using a compatible version of Outlook. The scheduling feature is available in Outlook 365, the Outlook desktop application, and the Outlook web app. If you are unsure about your version, navigate to the Help section in Outlook and look for “About Outlook” to confirm. If needed, update to the latest version to access all functionalities.
Next, if you haven’t set up your email account in Outlook yet, follow these steps:
- Open Outlook and click on the File tab.
- Select Add Account and enter your email address.
- Follow the prompts to input your password and complete the setup.
Once your email account is set up, you’ll need to configure the necessary settings that support scheduling. For Outlook 365 and the Outlook desktop app, do the following:
- Navigate to File > Options.
- In the Options menu, select Mail.
- Scroll to the Send Messages section and ensure that the Do not deliver before option is enabled.
For the Outlook web app, ensure that your settings are correctly configured by:
- Clicking the Settings icon (gear symbol) on the top-right corner.
- Selecting View all Outlook settings at the bottom of the pane.
- Under Mail, navigate to Compose and reply and check the scheduling options available.
With these steps completed, you are now ready to explore how to schedule an email in Outlook. Whether you are using Outlook 365, the desktop app, or the web app, your account is now fully equipped to take advantage of the scheduling feature.
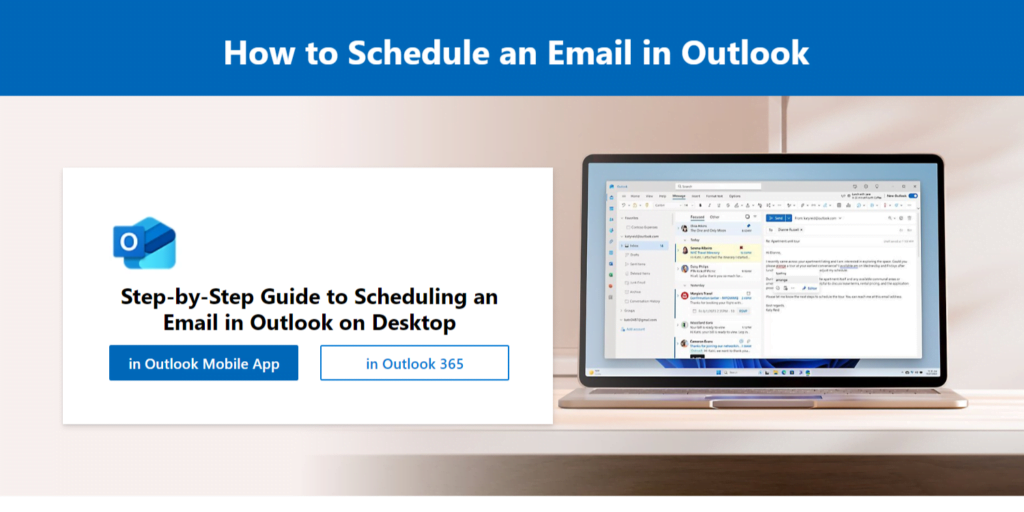
Step-by-Step Guide to Scheduling an Email in Outlook on Desktop
Scheduling an email in Outlook desktop application is a straightforward process that can help manage your communications more effectively. Follow these steps to learn how to schedule an email in Outlook on desktop:
1. Open Outlook and Compose a New Email
Start by launching the Outlook desktop application on your computer. Click on the “New Email” button located in the top-left corner of the screen to open a new message window. Compose your email by entering the recipient’s email address, subject, and body of the message.
2. Access the Scheduling Feature
Once your email is ready, navigate to the “Options” tab in the message window. Look for the “Delay Delivery” button in the “More Options” group. Clicking on this button will open the “Properties” dialog box, where you can set your email’s delivery options.
3. Set the Desired Send Time
In the “Properties” dialog box, locate the “Delivery options” section. Check the box labeled “Do not deliver before” and select the desired date and time for sending your email. This ensures your email will be sent at the specified time, even if you are not online.
4. Confirm and Send Your Email
After setting the delivery time, click the “Close” button to close the “Properties” dialog box. Then, click the “Send” button in the main message window. Your email will now be saved in the “Outbox” folder and will be sent automatically at the scheduled time.
By following these steps, you can easily schedule an email in Outlook desktop application to send later. Whether you need to manage your workload more efficiently or ensure timely communication, this feature provides a convenient solution for your email scheduling needs.
Scheduling Emails in Outlook for Web Users
Scheduling emails in the Outlook web app is a straightforward process that offers flexibility and convenience for users who prefer managing their communication online. While the core functionality remains consistent with the desktop version, the interface and navigation differ slightly. This guide will walk you through the steps to schedule an email in Outlook for the web, ensuring you can effectively manage your email timing.
First, log in to your Outlook web account through your preferred browser. Once you are on the main dashboard, click on the “New Message” button located on the left-hand side of the screen. This will open a new email composition window.
Next, compose your email as you normally would. Fill in the recipient’s email address, subject line, and your message content. Once you have completed your email, look for the “Send” button. Adjacent to it, you will see a dropdown arrow or an ellipsis (three dots) depending on your version of Outlook.
Click on this dropdown arrow or ellipsis, and you will see an option labeled “Schedule send” or similar. Selecting this option will open a scheduling window. Here, you can choose a specific date and time for when you want your email to be sent. Use the calendar and time fields to set your preferred schedule. Ensure the time zone reflected is accurate to avoid any discrepancies in email delivery.
After setting the date and time, click “Send” or “Schedule Send” to finalize the process. Your email will now be stored in the “Drafts” or “Scheduled” folder, depending on your Outlook configuration, until it is sent at the designated time.
Scheduling emails in Outlook for web users is a practical feature that enhances productivity, allowing you to coordinate communication across different time zones and manage your email dispatch more effectively. With these simple steps, you can ensure your emails are sent precisely when intended, even if you are not online at that moment.
Using Outlook Mobile App to Schedule Emails
Scheduling emails in the Outlook mobile app, available for both iOS and Android, is a convenient feature that ensures your messages are sent at the most appropriate times. While the process is largely similar across both platforms, there are some minor differences in the interface that users should be aware of. This guide will walk you through the steps on how to schedule an email in the Outlook app, ensuring you can manage your communications efficiently.
Firstly, open the Outlook app on your mobile device and tap the “Compose” button to start a new email. Once you have drafted your email, tap the three-dot menu icon located in the top right corner of the screen. On iOS, this icon appears as three horizontal dots, whereas on Android, it may appear as three vertical dots.
From the dropdown menu, select the “Schedule Send” option. This will open a new window where you can set the date and time you want your email to be sent. On iOS, this option is directly listed, while on Android, you may need to tap “Options” first before seeing “Schedule Send.”
After selecting “Schedule Send,” a calendar and clock interface will appear, allowing you to choose the exact date and time for your email. Once you have set your preferred schedule, tap “Done” on iOS or “Save” on Android to confirm your settings. Finally, tap the “Send” button, and your email will be queued to send at the specified time.
The steps to schedule an email in the Outlook mobile app are straightforward, but it’s essential to double-check your scheduled time to ensure accuracy. This feature is particularly useful for sending emails across different time zones or ensuring your message is delivered at a time when it is most likely to be seen.
By learning how to schedule an email in Outlook mobile app, you can optimize your email management and ensure timely communication, regardless of your location or time constraints.
Managing and Editing Scheduled Emails
Once you have taken the steps to schedule an email in Outlook, it is equally important to know how to manage and edit these scheduled emails. This process can be critical, especially if you need to make last-minute changes or cancel the email altogether. Here, we will guide you through the steps to view, edit, and delete scheduled emails, ensuring that your email management is seamless and stress-free.
Accessing the Scheduled Email Folder
Firstly, to manage your scheduled emails, you need to access the folder where these emails are stored. In the Outlook desktop application, navigate to the ‘Outbox’ folder, which is the default location for all scheduled emails. If you are using Outlook 365 or the Outlook web app, the process is similar. Simply look for the ‘Outbox’ in the left-hand pane of your mailbox.
Editing Scheduled Emails
If you need to edit a scheduled email, start by opening the email from the ‘Outbox’ folder. In Outlook desktop, double-click on the email to open it. You can then make changes to the content, recipients, or attachments just as you would with a regular email. To reschedule the email, navigate to the ‘Options’ tab and adjust the ‘Do not deliver before’ settings to your new preferred date and time. In Outlook 365 or the Outlook app, open the scheduled email and follow a similar process to modify the send time under the delivery options.
Deleting Scheduled Emails
Should you need to cancel a scheduled email, the process is straightforward. Locate the email in the ‘Outbox’ folder and simply delete it. This action will remove the email from the queue, ensuring it is not sent. In the Outlook web app or Outlook 365, you can select the email and click on the delete icon to achieve the same result.
Troubleshooting Common Issues
While managing scheduled emails, you may encounter some common issues. For instance, if you find that your scheduled email is not sent at the specified time, ensure that Outlook is connected to the internet. Another common issue is the email remaining in the ‘Outbox.’ This can happen if there are errors in the email content or recipient addresses. Double-check these details to resolve the problem.
Knowing how to schedule an email in Outlook, how to schedule an email in Outlook 365, and how to schedule an email in the Outlook app is crucial, but managing these scheduled emails effectively ensures that your communication is precise and timely.
Best Practices for Email Scheduling
Scheduling emails can be a powerful tool for enhancing productivity and ensuring timely communication. However, to make the most out of this feature, it is essential to follow some best practices. One of the foremost considerations is identifying the optimal times to send emails. Research suggests that emails sent during mid-week, particularly on Tuesdays and Thursdays, and during mid-morning hours, around 10 AM, typically yield higher engagement rates. Understanding your audience and their habits can further fine-tune these timings.
Another crucial aspect is drafting emails in advance. This allows for a thorough review and ensures that the content is coherent and free of errors. When drafting, it is beneficial to keep the message concise and focused, with clear subject lines and actionable call-to-actions. This not only makes the email more effective but also respects the recipient’s time.
The importance of reviewing scheduled emails cannot be overstated. Before setting an email to send later, review it multiple times to check for any grammatical errors, incorrect information, or issues with formatting. This final review step ensures that your email maintains professionalism and accuracy, reinforcing your credibility.
In summary, utilizing email scheduling in Outlook, whether it’s in the Outlook app, Outlook 365, Outlook desktop, or the Outlook web app, can significantly improve your workflow and communication strategy. By sending emails at optimal times, drafting messages in advance, and conducting thorough reviews, you can maximize the effectiveness of your communications. Start implementing these practices today to enhance your productivity and ensure your emails have the desired impact.